Salesforce Just-in-Time (JIT) User Provisioning with SafeNet Trusted Access
Overview
This guide documents the procedure to enable Just-in-Time (JIT) Provisioning of users from SafeNet Trusted Access to Salesforce. This procedure allows automatic user account creation in Salesforce after successful, SAML based, authentication using SafeNet Trusted Access
Note
This guide assumes Salesforce is federated to SafeNet Trusted Access using SAML, the integration can be found here
Prerequisites
Salesforce is configured using My Domain configuration
Salesforce is federated to SafeNet Trusted Access using SAML (Single Sign-On)
A user with a SafeNet Trusted Access authenticator is enrolled
Users can authenticate using SafeNet Trusted Access
Solution Overview
With Just-in-Time (JIT) provisioning, SafeNet Trusted Access passes user information to your Salesforce org in a SAML assertion to automatically create user accounts. SafeNet Trusted Access sends user information to your org in an Attributes statement in the SAML assertion. When a user logs in to an org with standard JIT provisioning enabled, Salesforce pulls user data from the identity provider and stores it in a new User object.
Configuration Steps
The configuration requires the following steps:
In Salesforce
Modify the configured Single Sign-on policy to enable Provisioning
Identify the Profile to be configured for provisioning
In SafeNet Trusted Access
Modify Salesforce application in STA to add SAML Return Attributes
Salesforce Configuration
Modify the configured Single Sign-on policy to enable Provisioning
In order to enable Just in Time (JIT) Provisioning in Salesforce, we have to modify the existing Single Sign-on policy
In Salesforce Console, modify the policy by following these steps:
Login to Salesforce as a System Administrator
Navigate to Identity and click on Single Sign-On Settings
Click Edit to edit your existing SAML Configuration

Change SAML Identity Type to Assertion contains the Federation ID from the User object
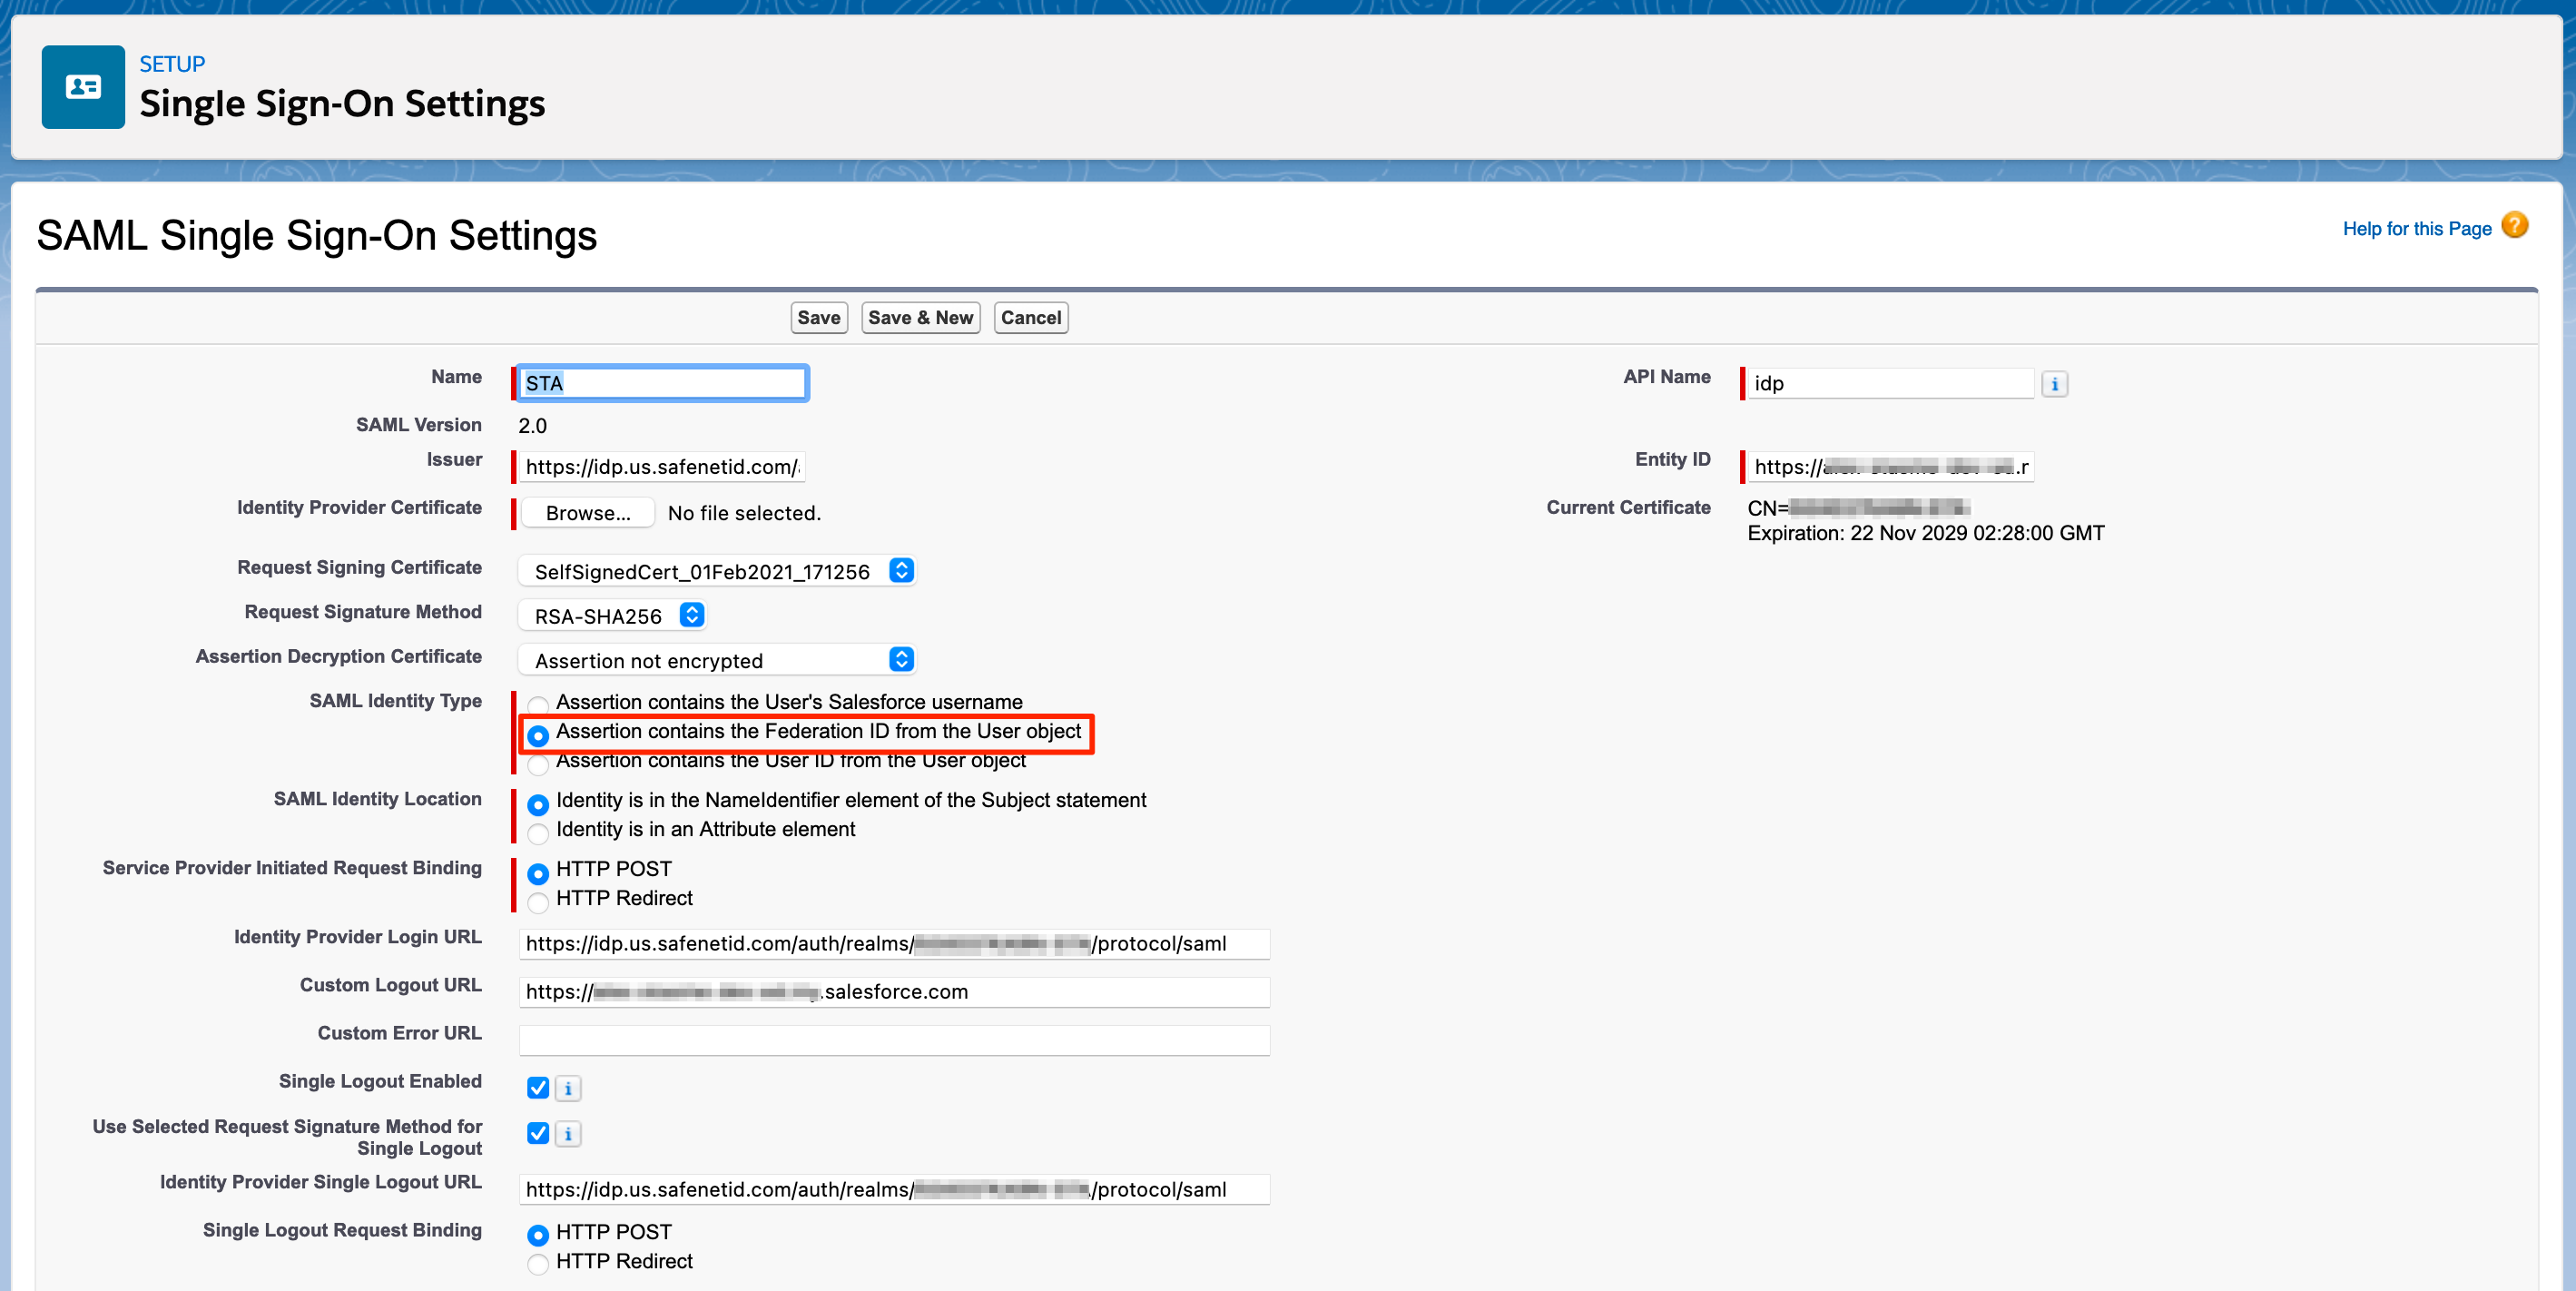
Under Just-in-time User Provisioning, enable User Provisioning Enabled
Make sure Standard is selected

Click Save to save the configuration
Note
For greater control over the provisioning process, Salesforce supports Custom SAML JIT with Apex handler, more information can be found here
Warning
Once the federation SAML Identity Type is changed, users without Federation ID will fail to authenticate using SafeNet Trusted Access. To overcome this, open the user’s account object under Users and set the Federation ID in Single Sign On Information to the user’s email address

Salesforce is ready for Just-in-Time (JIT) User Provisioning.
Identify the Profile to be configured for provisioning
To set the provisioning of users to the correct Salesforce Profile we need to identify the Profile ID in Salesforce. The easiest way to achieve this is by opening the desired profile and copying the Profile ID from the URL
In Salesforce Console, open and identify the Profile by following these steps:
Login to Salesforce as a System Administrator
Navigate to Users and click on Profiles
Find the Profile you would like to be used for Provisioning (for example: Standard User)
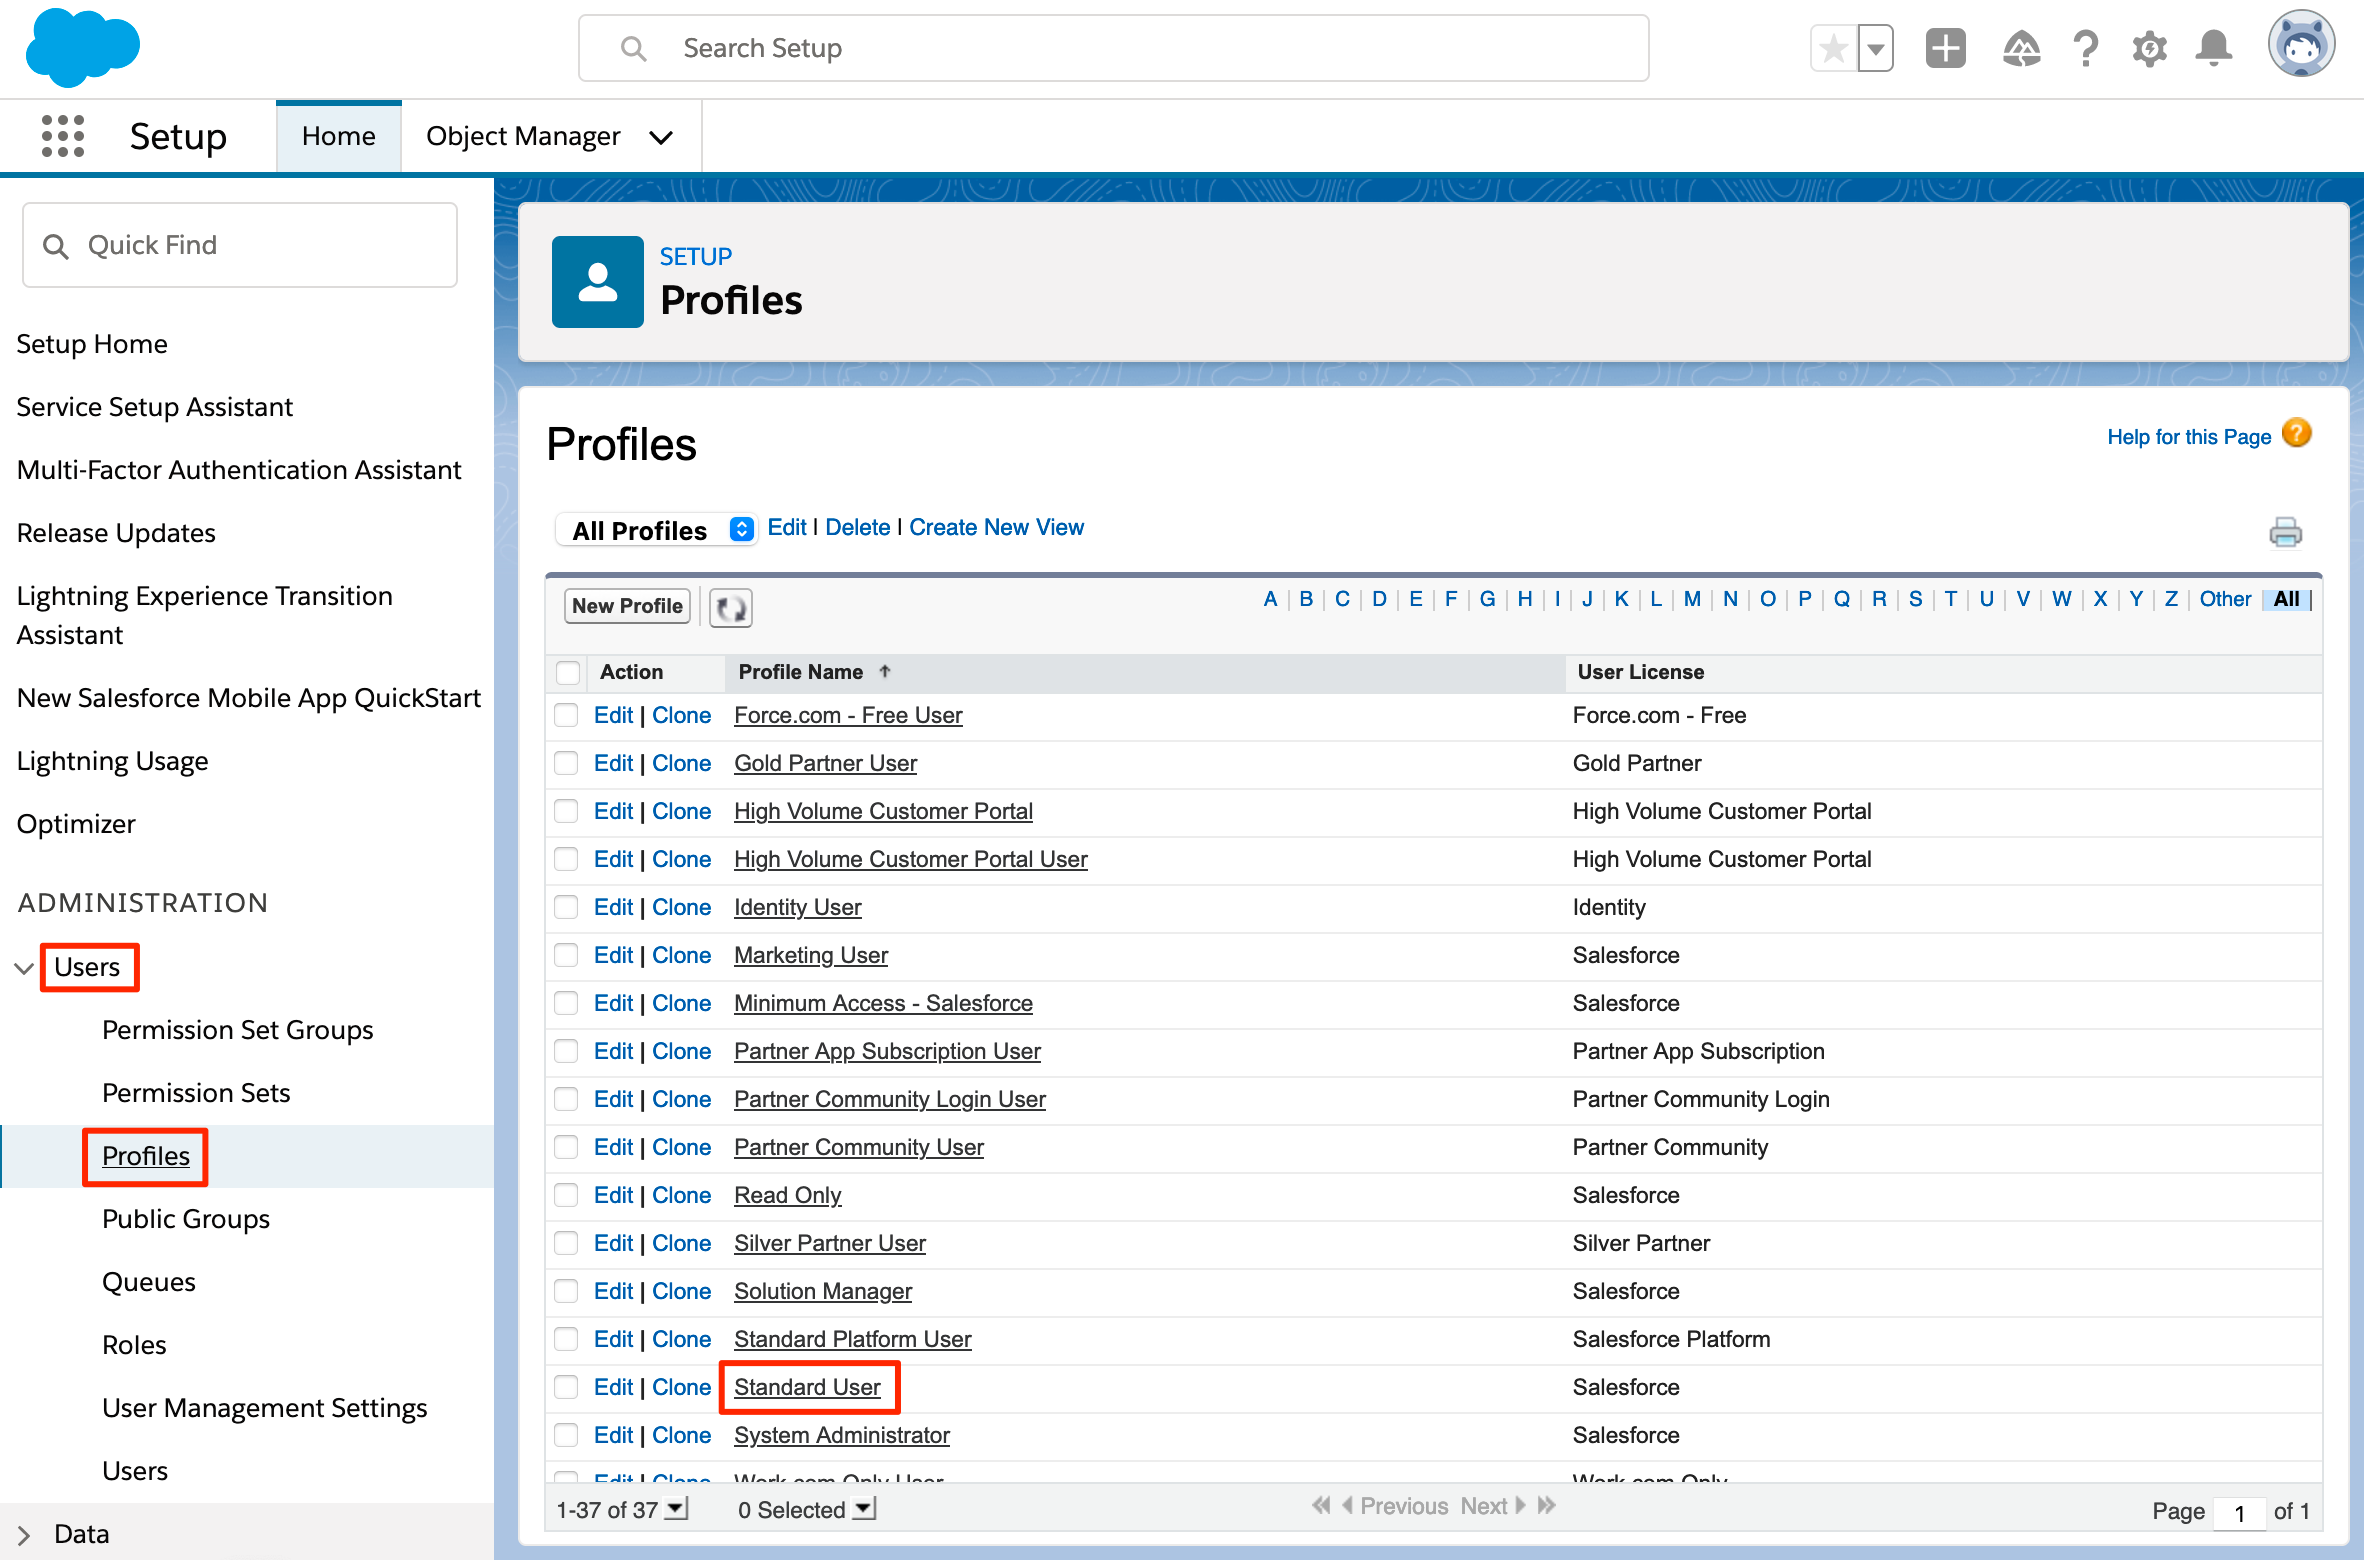
Click on the Profile Name (for example: Standard User)
In the browser address bar, look at the end of the URL, the Profile ID is the value following address=%2F, starting with 00

Copy the value and save it for later use in SafeNet Trusted Access Configuration
SafeNet Trusted Access configuration
Note
Open SafeNet Trusted Access Console (you can use the following direct links based on your availability zone, opens in a new tab)
US Zone SafeNet Trusted Access Console
EU Zone SafeNet Trusted Access Console
Classic Zone SafeNet Trusted Access Console
Modify SafeNet Trusted Access - Salesforce application
In order to be able to provide the needed information for user creation in Salesforce, SafeNet Trusted Access - Salesforce application we’ve created to establish SAML based authentication, has to be modified by adding SAML Return Attribues.
In the STA Console, modify the Salesforce application by following these steps:
Go to the Applications tab
Click Salesforce Application
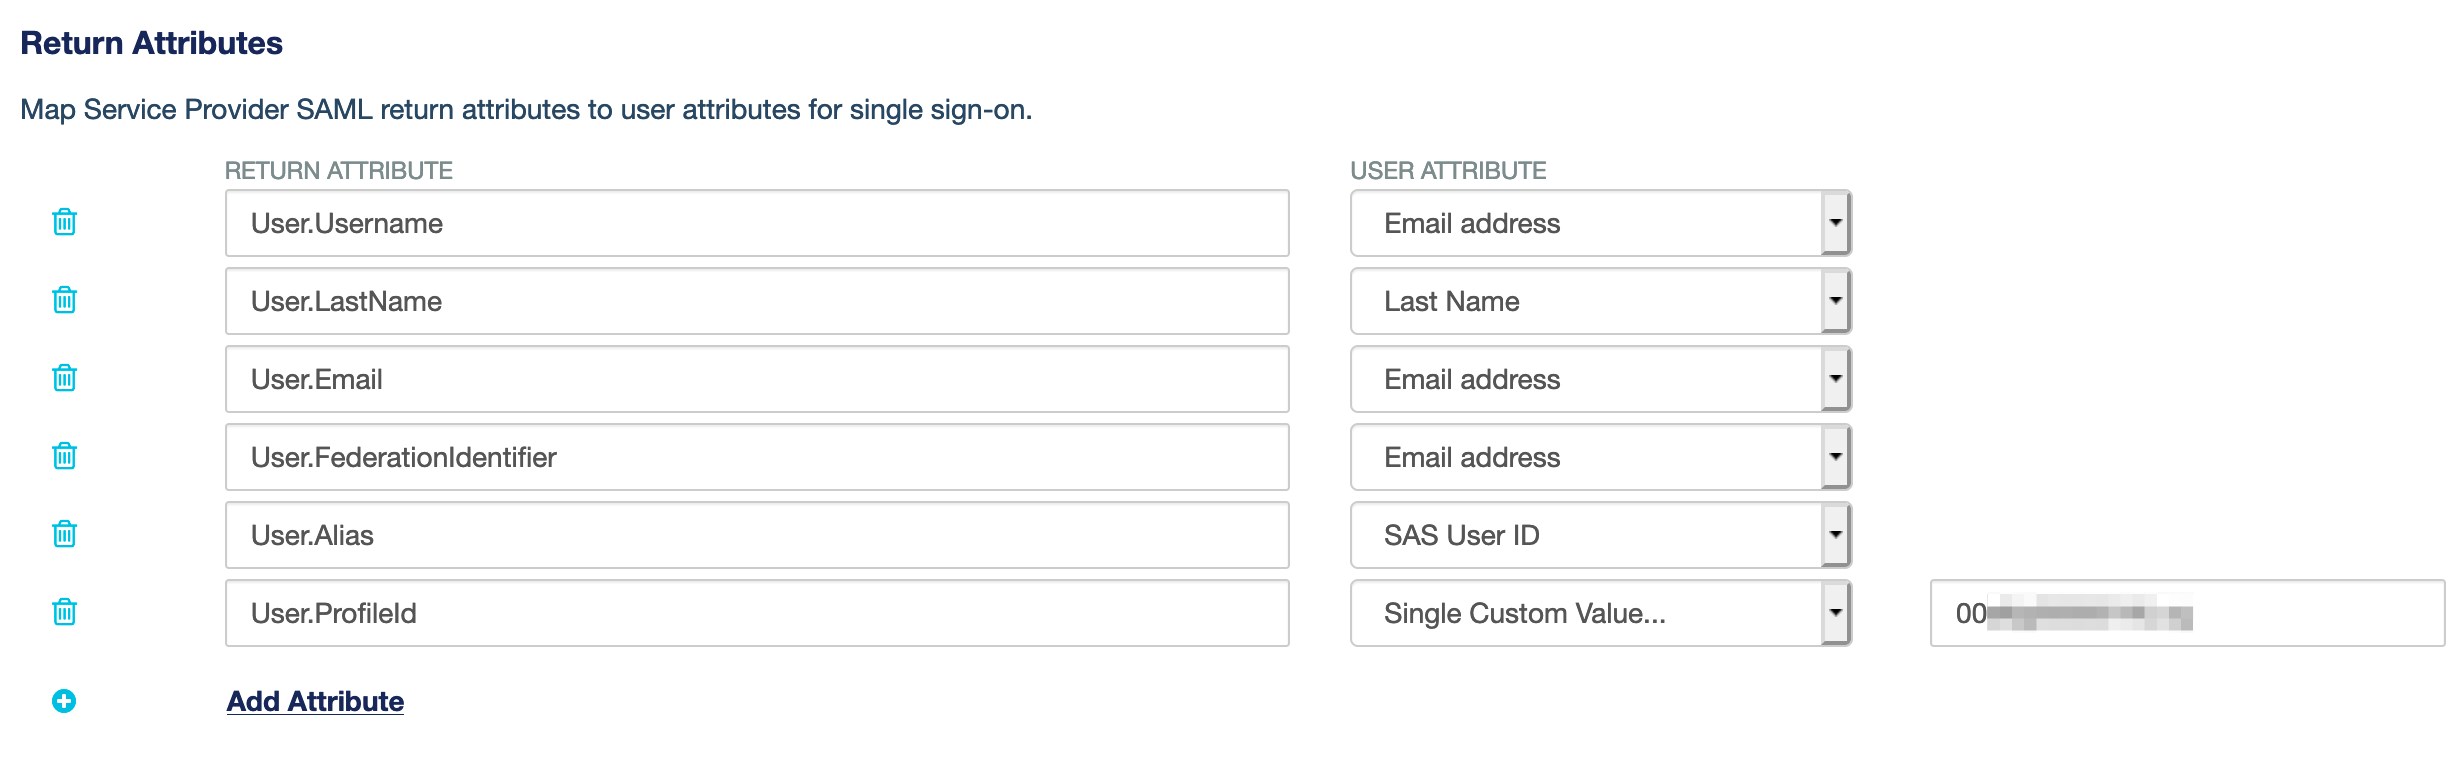
Under Return Attribues, click on Add Attribue
Add the following Attributes and Mappings:
Note
Return Attribues are key sensative (use copy to copy the values)
Return Attribute |
User Attribute (Mapping) |
Custom Value |
User.Username
|
Email address |
|
User.LastName
|
Last Name |
|
User.Email
|
Email address |
|
User.FederationIdentifier
|
Email address |
|
User.Alias
|
SAS User ID |
|
User.ProfileId
|
Single Custom Value… |
Salesforce Profile ID (saved in this section) |
Example:
Save the updated Salesforce application
SafeNet Trusted Access is ready for Salesforce Just-in-Time (JIT) User Provisioning
Testing the solution
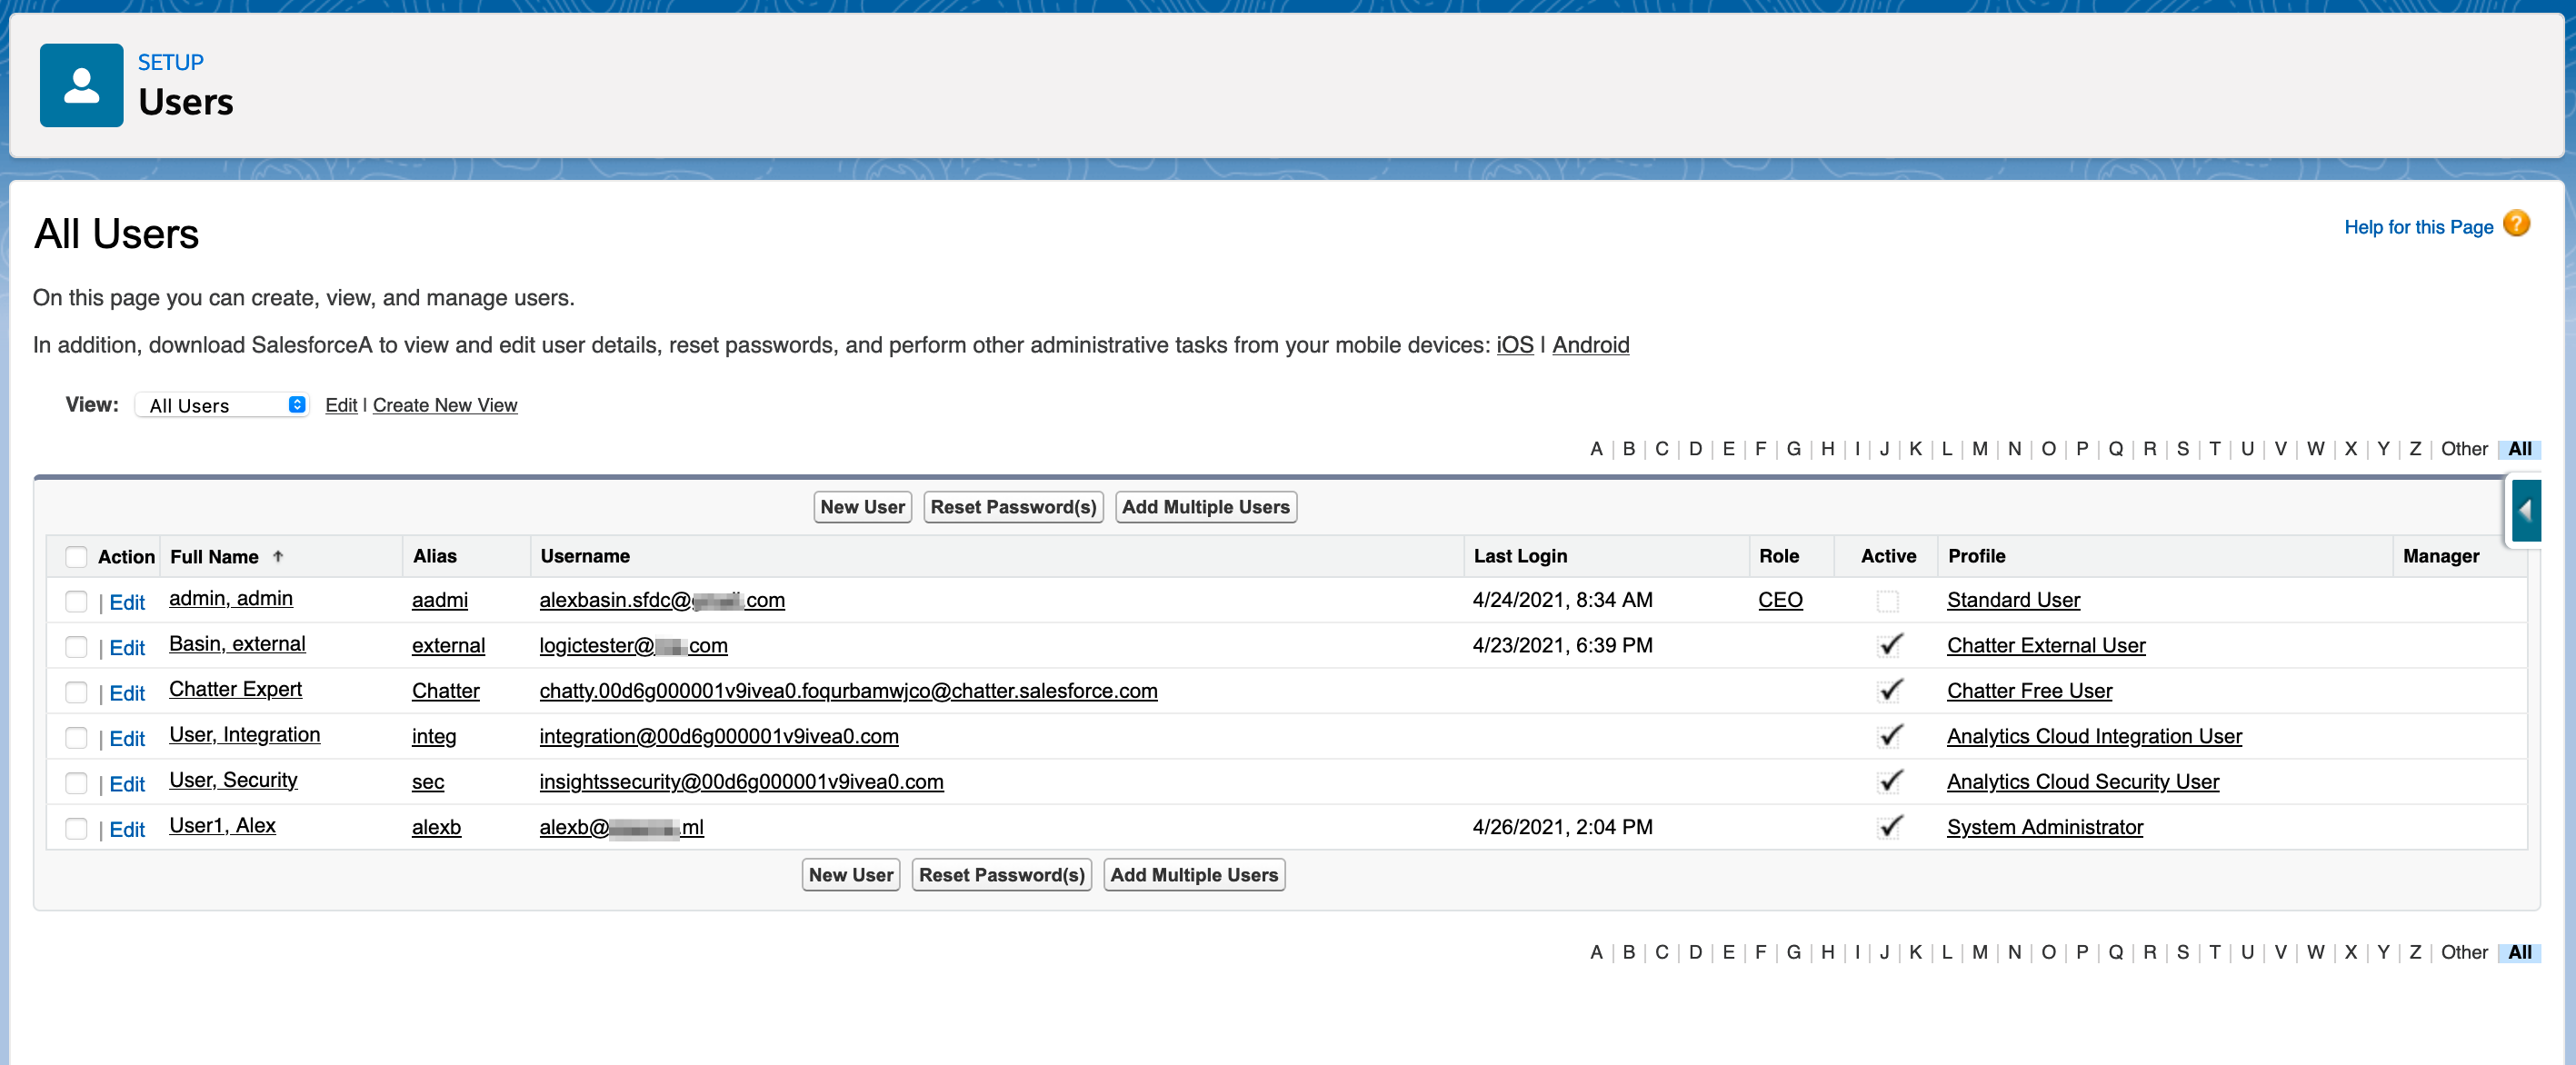
Login to Salesforce using your direct URL or using the published application in SafeNet Trusted Access User Portal, with an account that does not yet exist in Salesforce. After succesful authentication, the user’s account is automatically created and the user is logged in. Verify the user account creation in Salesforce Console - Users
Before provisioning:
User Login:

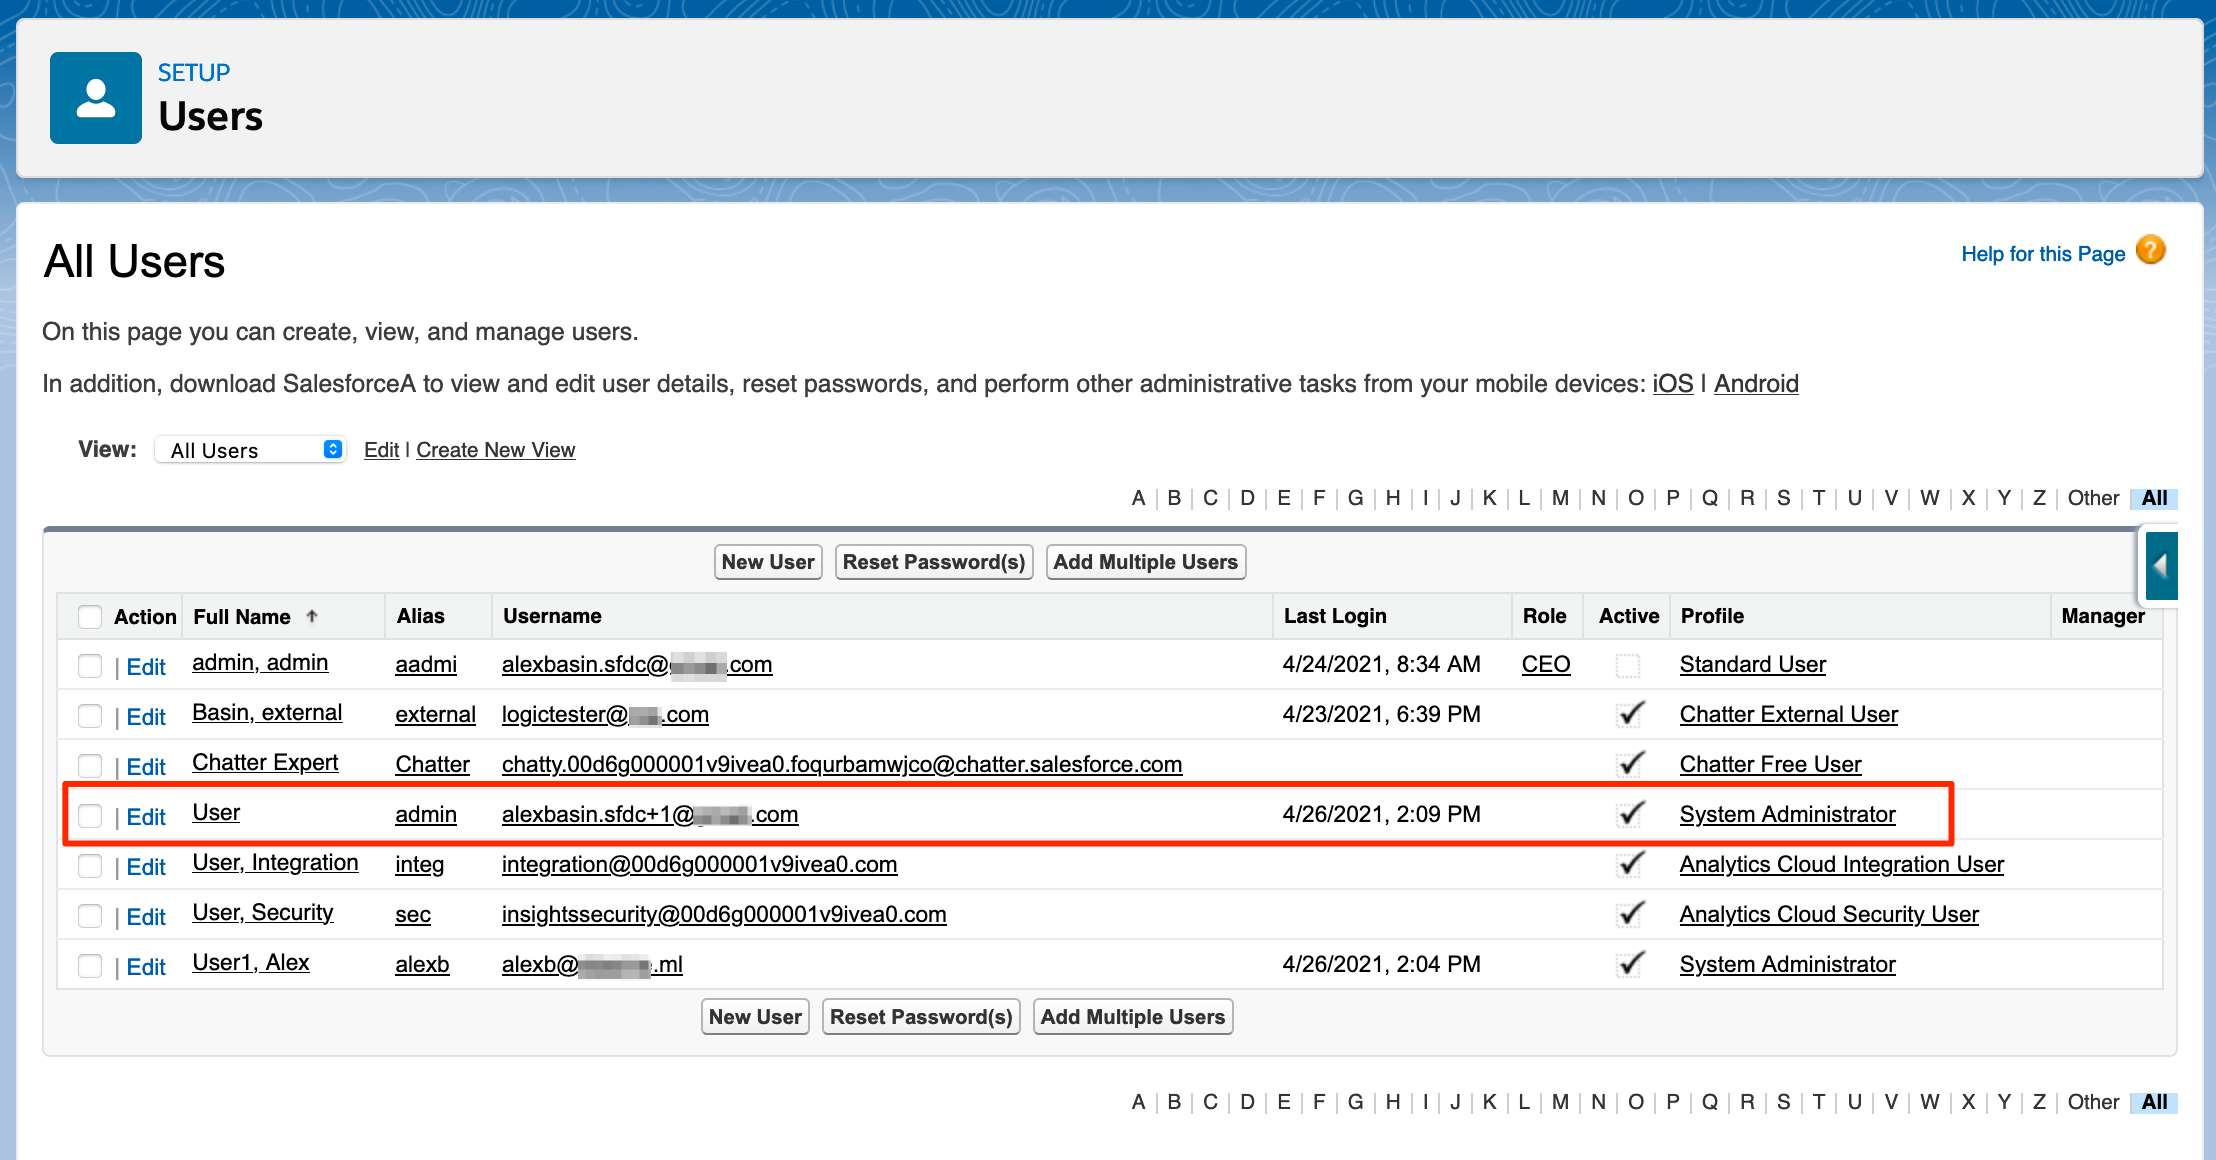
After provisioning:
Troubleshooting
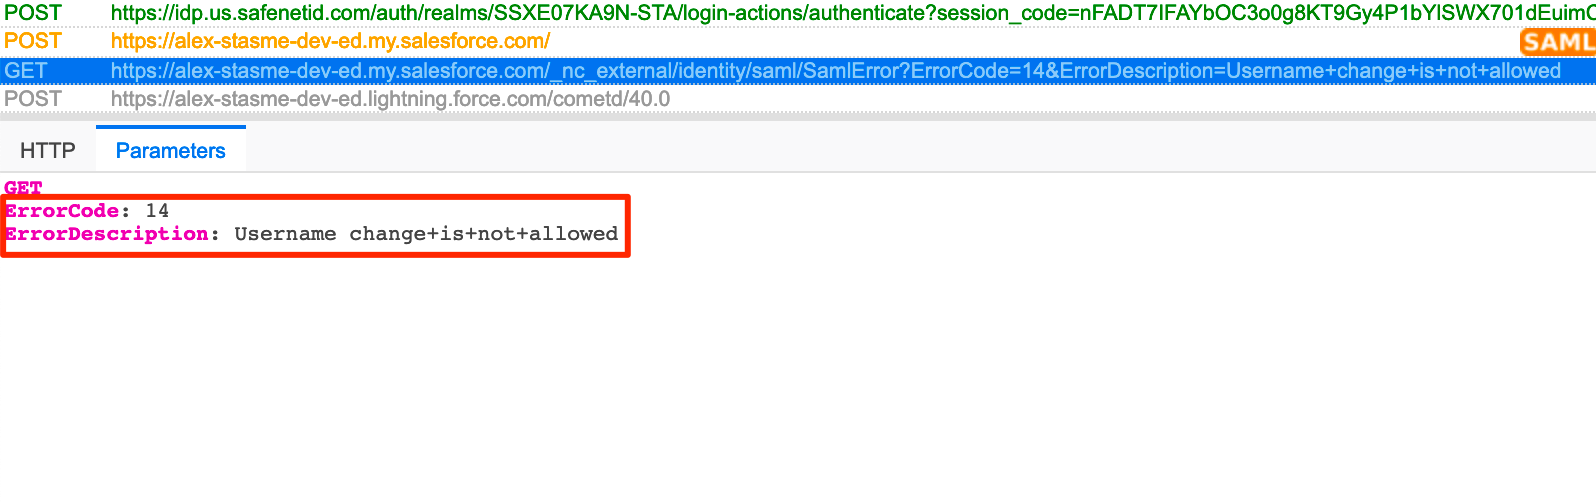
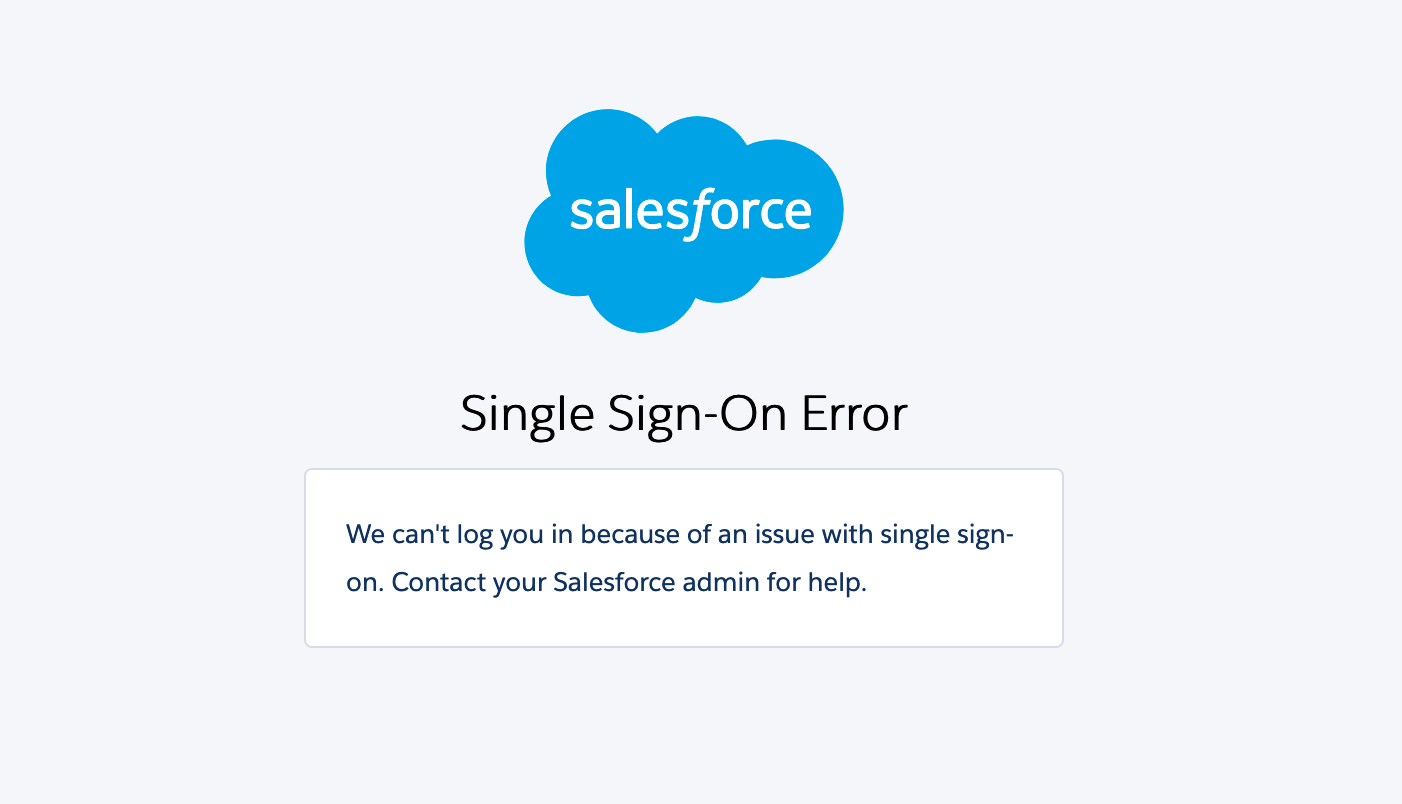
Salesforce provides error messages in the URL after a failed login. You can check the end of the URL for the error message or use SAML Tracer to see the error as a clear text for easier parsing.
Browser - SAML Login Error:
Browser - URL Error Details:

SAML Tracer - Error Details: